
To reconfigure the Dante device via the Dante Controller:
1. Open the Dante Controller.
2. Double-click on the Dante device you want to connect with your 2wcom device.
![]() The window Device View opens.
The window Device View opens.
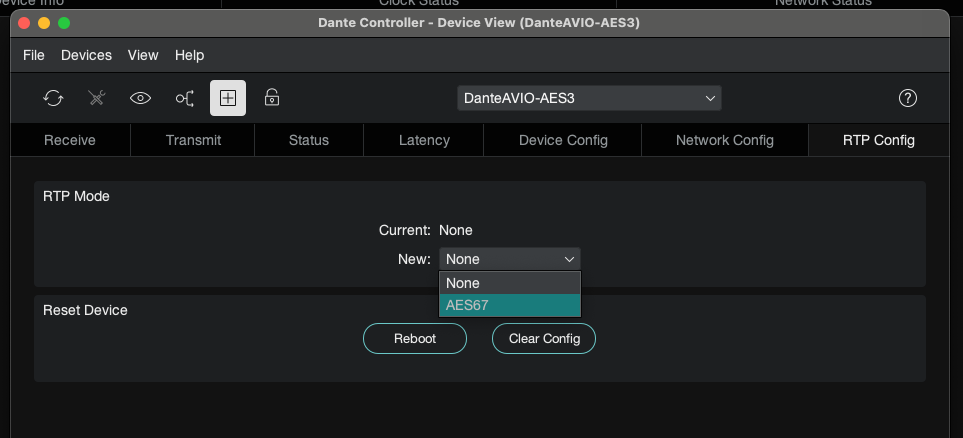
3. Click on the tab RTP Config.
4. In the block RTP Mode select AES67 as the new mode from the drop-down menu.
5. Click Reboot.
![]() You have reconfigured the Dante device.
You have reconfigured the Dante device.
To set PTP as the main clock source:
1. Open the web interface of your 2wcom device.
2. Navigate to the page Time/Clock in the section System Settings.
3. Click on the tab PTP.
4. To enable Data1 for PTP, toggle the switch next to Data1 in the block Settings.
5. Click Save.
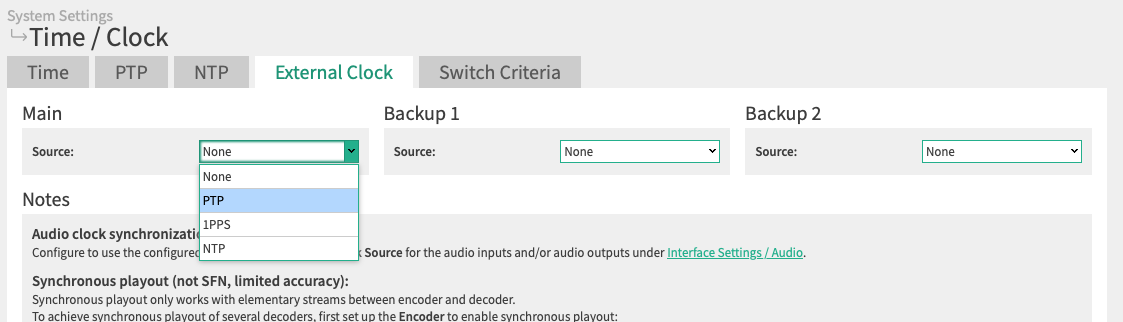
6. Click on the tab External Clock.
7. In the block Main select PTP as the source from the dropdown menu.
8. Click Save.
![]() You have set PTP as the main clock source.
You have set PTP as the main clock source.
To check the clock sources:
1. Navigate to the page Time/Clock in the section Status.
2. In the tab PTP/NTP the current clock sources are displayed.
Note: The green frame around the source indicates the currently used source.
![]() You have checked the clock sources.
You have checked the clock sources.

To configure the audio outputs for AES67:
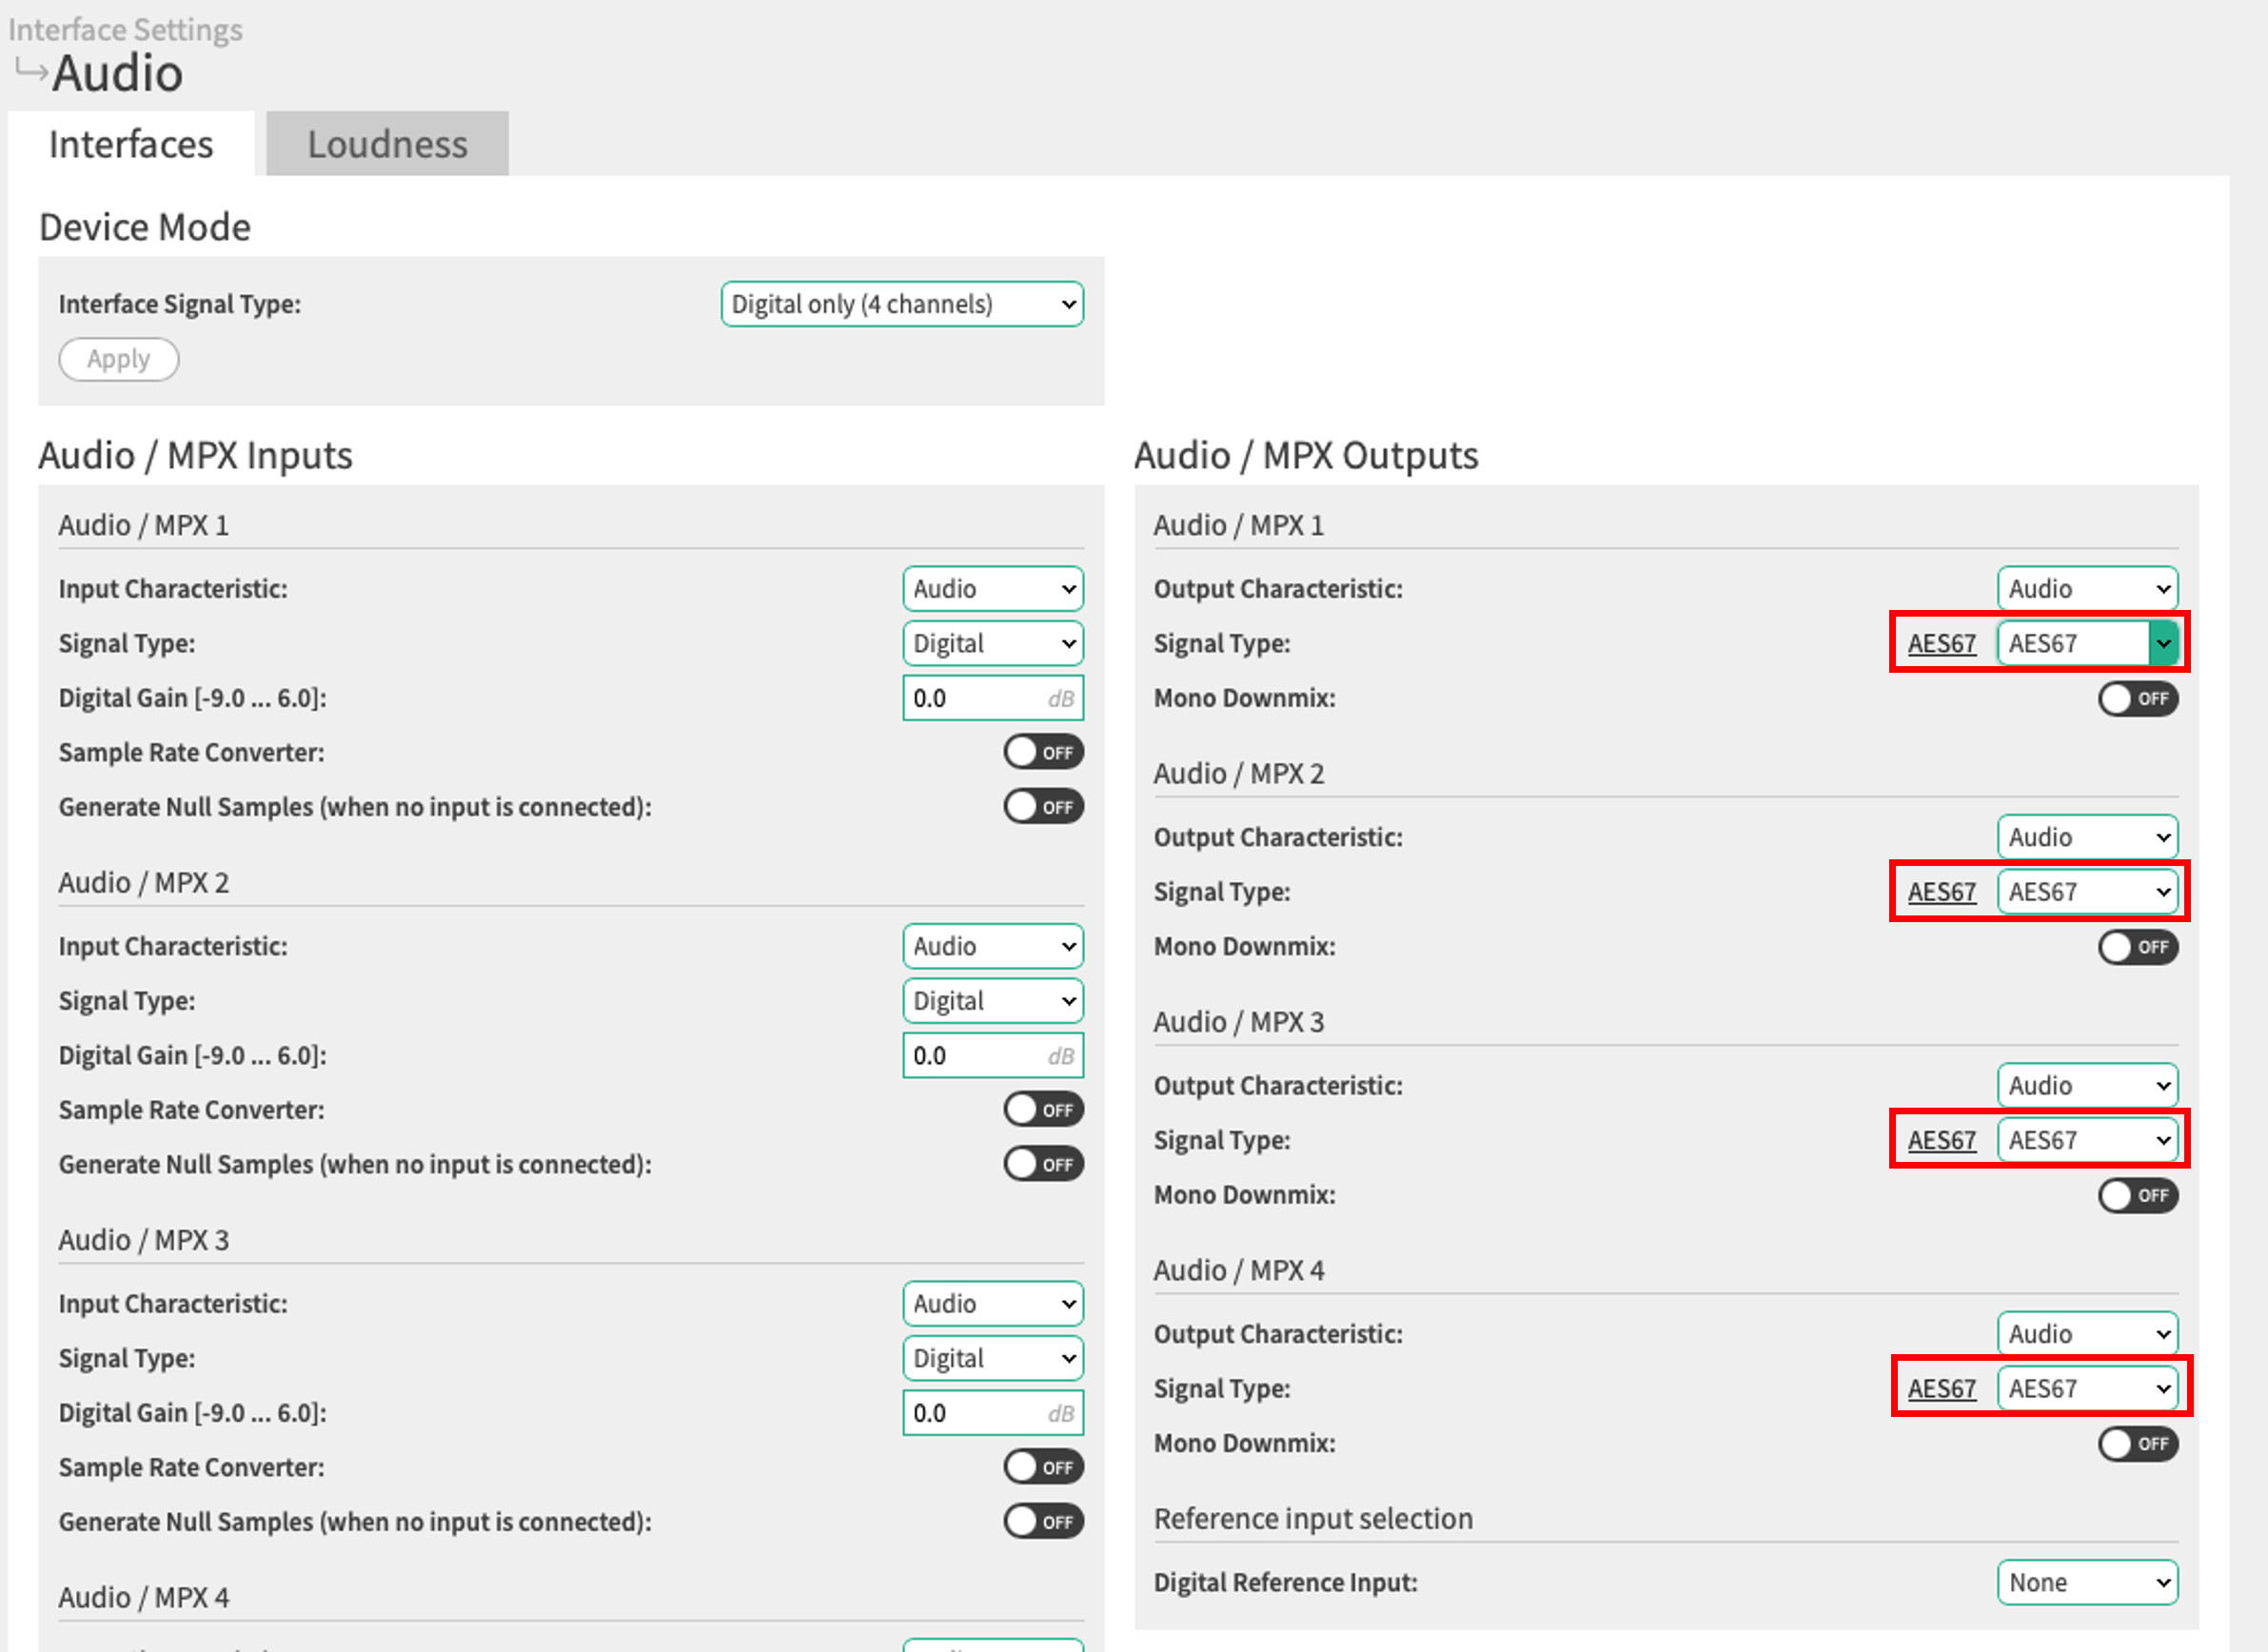
1. Navigate to the page Audio in the section Interface Settings.
2. Click on the tab Interfaces.
3. In the block Audio / MPX outputs change the signal type of each output to AES67.
4. Click Save.
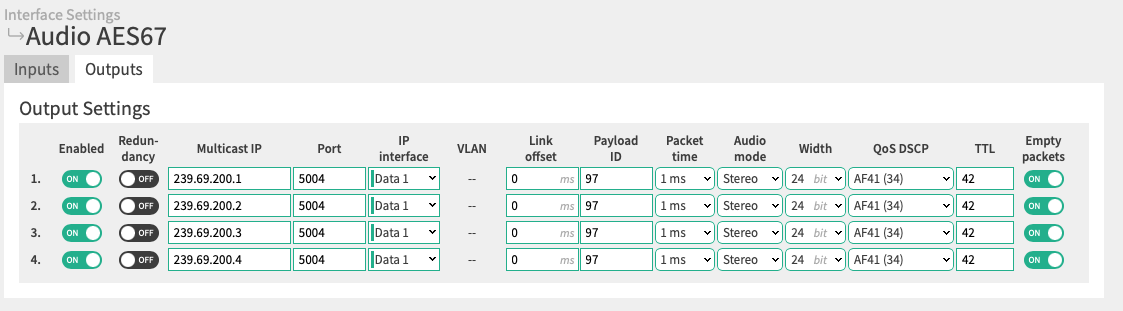
5. Navigate to the page Audio AES67 in the section Interface Settings.
6. Click on the tab Outputs.
7. Configure the parameters.
8. Click Save.
![]() You have configured the audio outputs for AES67.
You have configured the audio outputs for AES67.
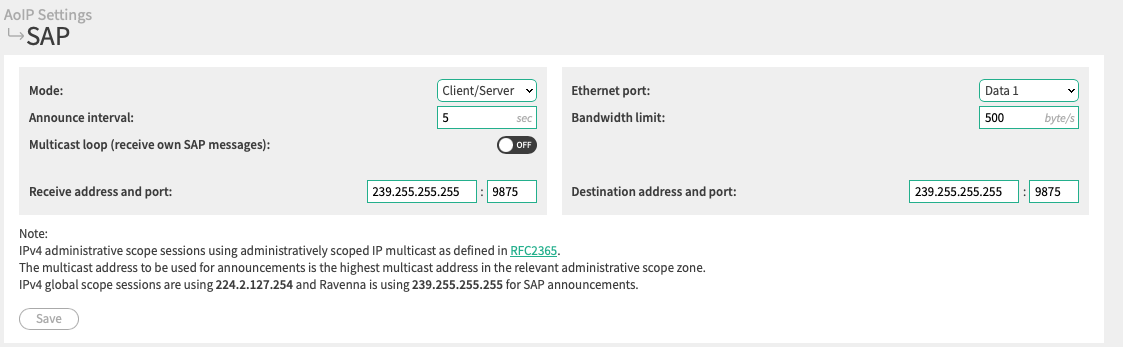
To ensure that your 2wcom device is available in the Dante Controller, the Session Announcement Protocol (SAP) needs to be set up.
To set up SAP:
1. Navigate to the page SAP in the section AoIP Settings.
2. Set the announce interval to 5 seconds.
3. Click Save.
![]() You have set up SAP.
You have set up SAP.
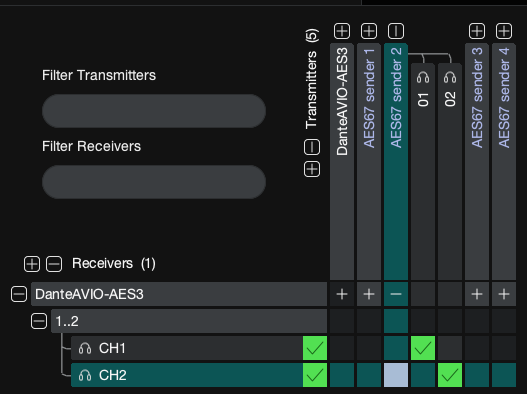
To route the signal of the channels from your 2wcom device to the Dante device:
1. Open the Dante Controller.
2. Navigate to the tab Routing.
![]() Two channels are displayed for each available AES67 stream.
Two channels are displayed for each available AES67 stream.
3. Select all the channels you want to transmit.
![]() The green check marks indicate which channels are selected.
The green check marks indicate which channels are selected.
![]() You have routed the selected channels from your 2wcom device to the Dante device.
You have routed the selected channels from your 2wcom device to the Dante device.
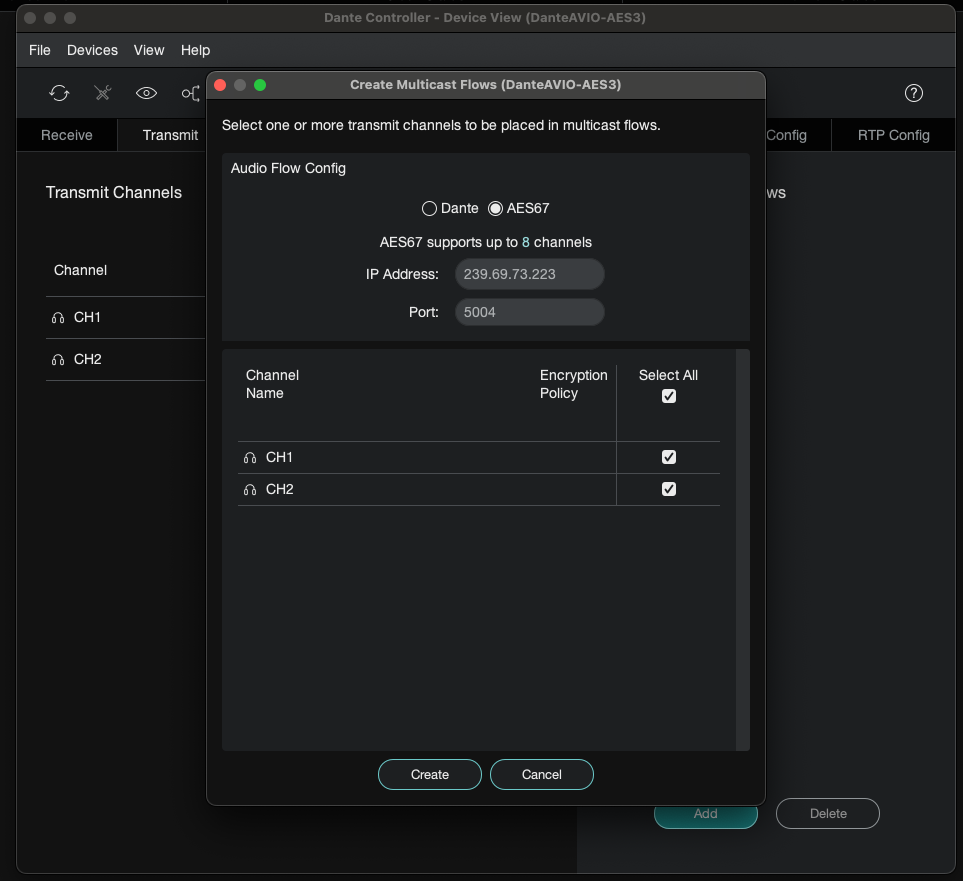
To set up a new multicast stream:
1. Open the Dante Controller.
2. Double-click on the Dante device you want to connect with your 2wcom device.
![]() The window Device View opens.
The window Device View opens.
3. Click on the tab Transmit.
4. Below Multicast Flow click on Add.
![]() The name Multicast Flow in the Dante web interface is equivalent to the name Multicast Stream in the 2wcom web interface.
The name Multicast Flow in the Dante web interface is equivalent to the name Multicast Stream in the 2wcom web interface.
![]() The window Audio Flow Config opens.
The window Audio Flow Config opens.
5. Set the audio flow config to AES67.
6. Select all channels you want to transmit.
7. Click Create.
![]() You have set up a new multicast stream.
You have set up a new multicast stream.
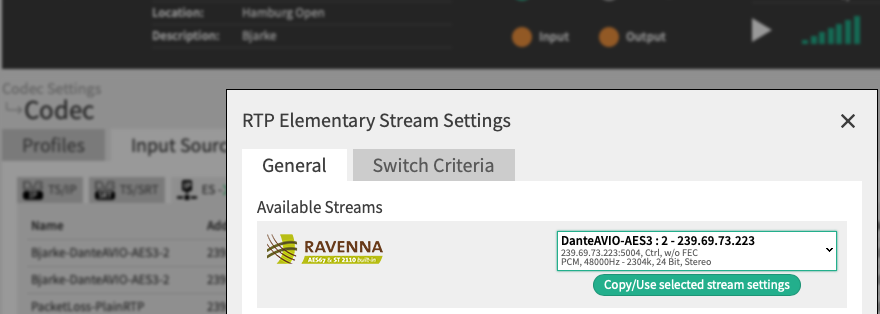
To configure the input source of your 2wcom device:
1. Open the web interface of your 2wcom device.
2. Navigate to the page Codec in the section Codec Settings.
3. Click on the tab Input Sources.
4. Click on the block IP ES RIST.
5. To create an input source, click ![]() .
.
5. Click on Edit.
![]() The window RTP Elementary Stream Settings opens.
The window RTP Elementary Stream Settings opens.
6. In the tab General select the configured Dante multicast stream.
7. Click Copy/Use selected stream settings.
8. Click Save.
![]() You have configured the input source of your 2wcom device.
You have configured the input source of your 2wcom device.
You have connected your 2wcom device with the Dante device in AES67 mode.